
Cisco UCM basic configuration steps
Required Hardware :
- Integrated Service Router – ISR
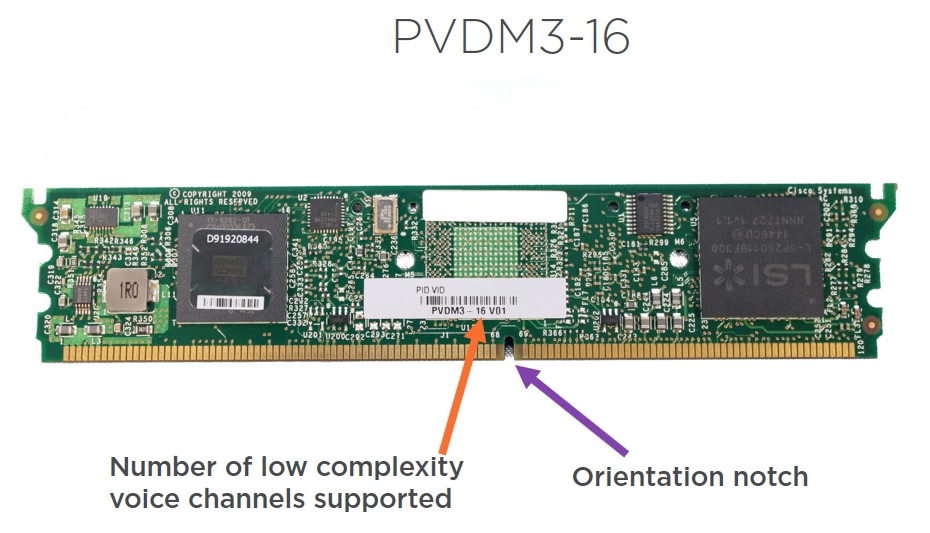
- PVDM / DSP – Digital signal Processor
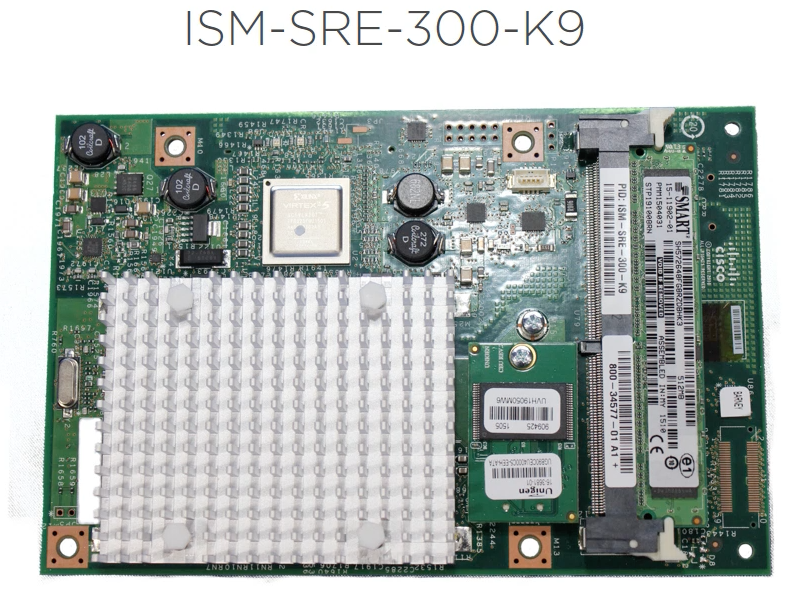
- Integrated Service Module – ISM
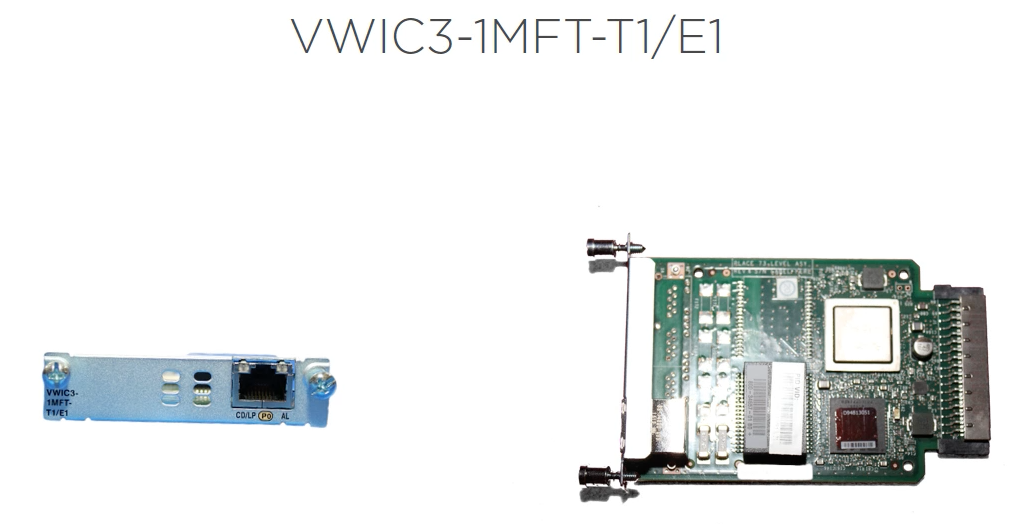
- Voice / WAN Interface Card
Integrated Service Router : Multiple services on a single platform

Packet Voice DSP Module – PVDM : Voice connections both digital and analog connections. conferencing and transcoding capabilites. Voice quality such as compression and echo cancellation. PVDM3s are available with 256 channels. Supported many different voice codecs.
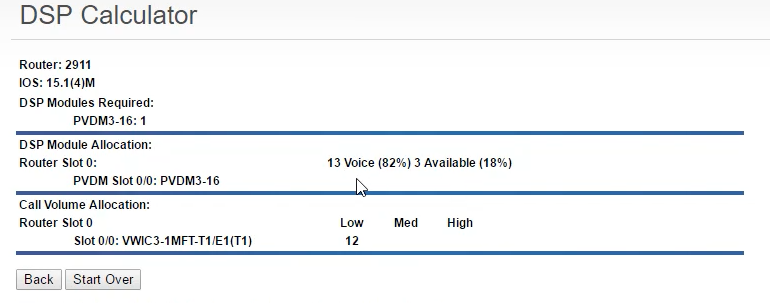
Use Cisco DSP Calculator: Check the requirement
https://www.cisco.com/c/en/us/support/web/tools-catalog.html
Integrated Service Module – ISM Provides voice mail and IVR/auto attendant functionality. Support multiple ports and easy administration.
Voice WAN Interface Card: Connect ISR to PSTN and support full PRI


Console connections
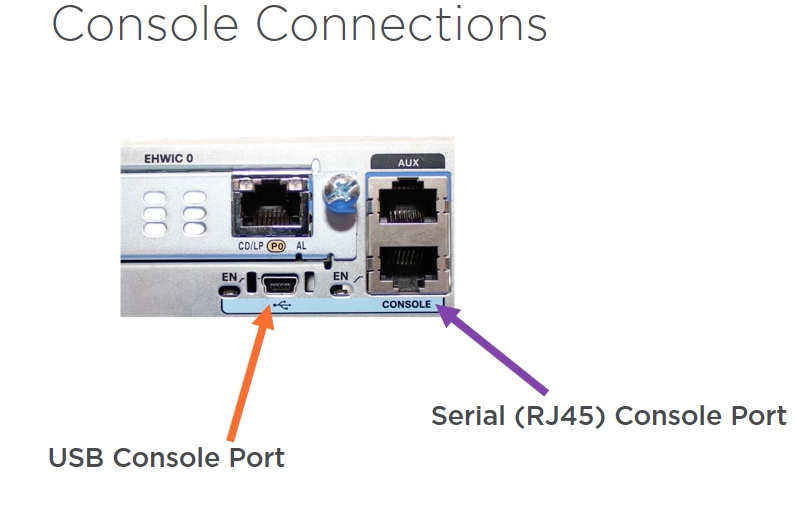
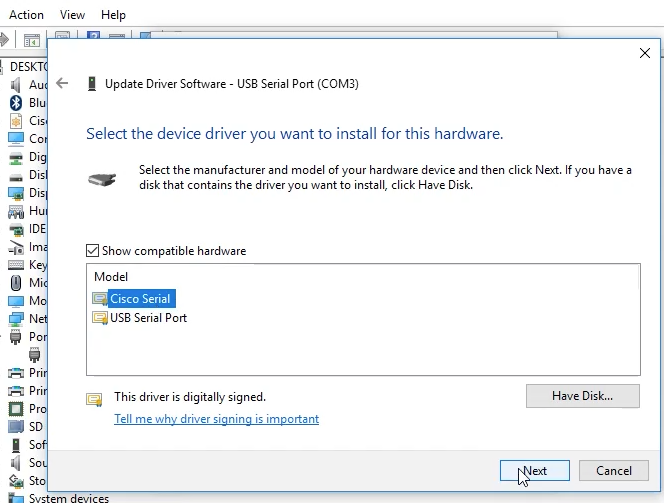
Download and Installing the console USB drivers from Cisco.com website.
Go to website Cisco.com – support & Downloads – select a product type : 2911 – search result choose “2911 Integrated Services Router” – then select option list – software on chassis – Usb console software
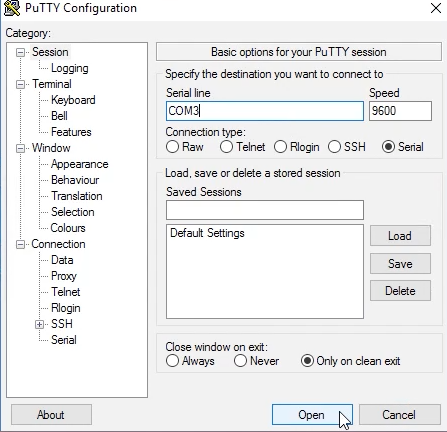
Download Putty from this link: https://www.putty.org
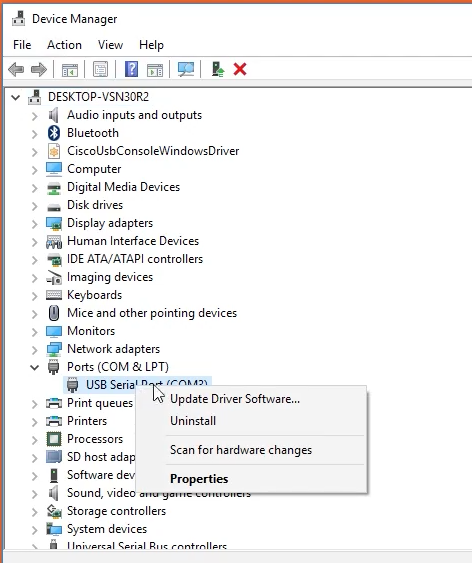
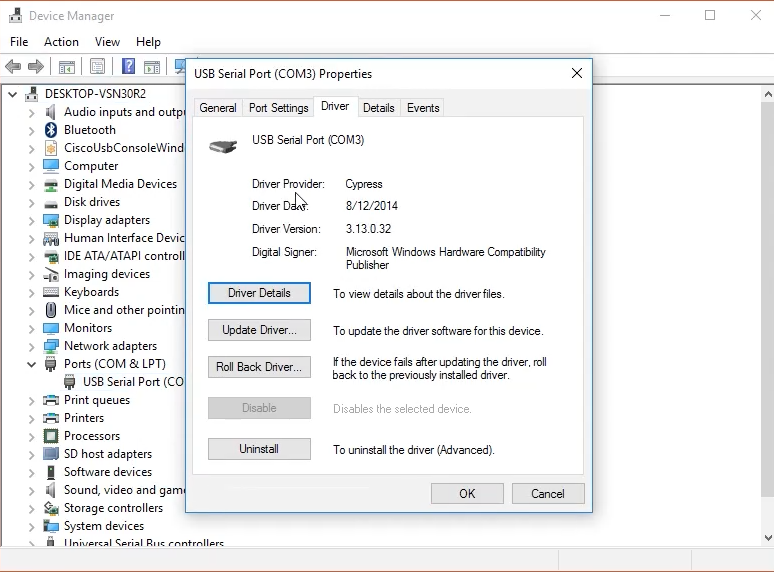
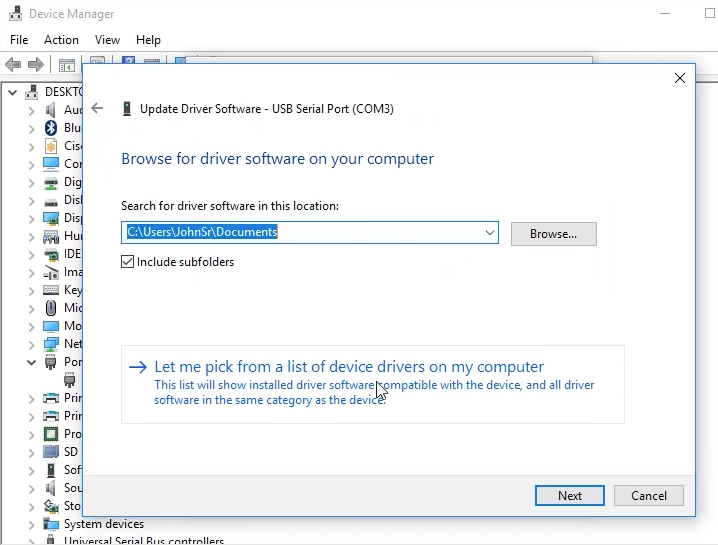
If you getting error after connect com3 port then choose correct version from the list.
Putty Error: Unable to open connection to COM3 / Unable to open serial port

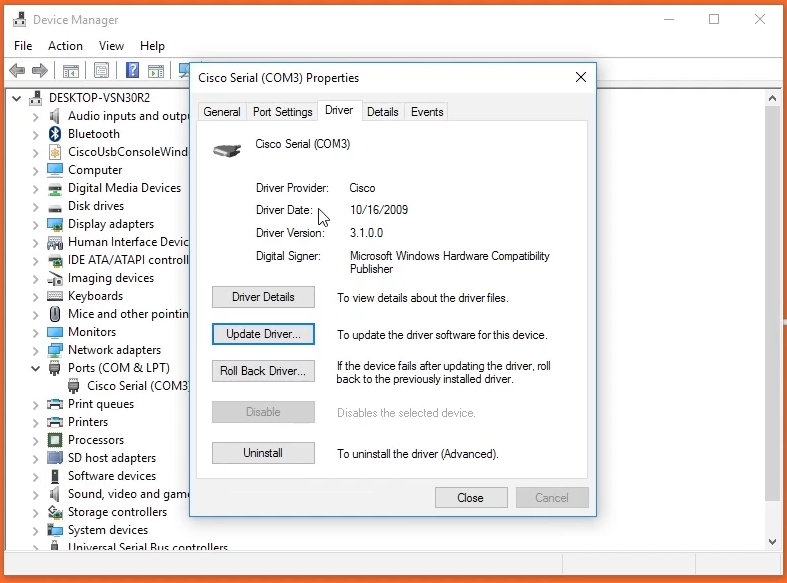
Fix this error change system Com port to Cisco usb driver from the list
putty connection – Serial line: COM3 – Serial – Speed: 9600
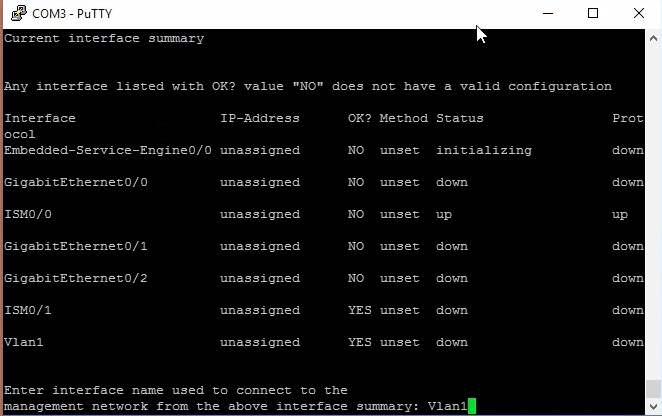
Router initial configuration set hostname and enable password

Configure SNMP Network Management: NO
Enter the interface name used to connect to the management network from the above interface summary: Vlan1
Configure IP on Vlan interface : Yes
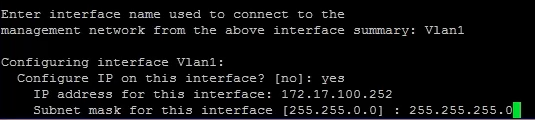
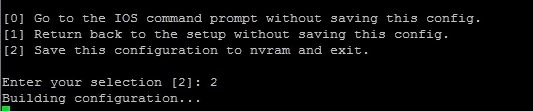
Save the configuration on NVRM and exit
Fix error message popup while booting ios “opening tftp://255.255…….”

Fix this error enter below command on console
PSIR_2911# terminal no monitor
PSIR_2911# Configure Terminal
PSIR_2911(config)# no logging console
PSIR_2911(config)# no service config
PSIR_2911(config)# Exit
PSIR_2911# copy running-config startup-config – hit enter again to save configuration settings.
PSIR_2911# reload – Reboot the entire system.
Next time reboot those error will remove from the iOS.
Console user creation:
PSIR_2911# config terminal
PSIR_2911(config)# user John privilege 15 secret 0 P@ssw0rd
PSIR_2911(config)#exit
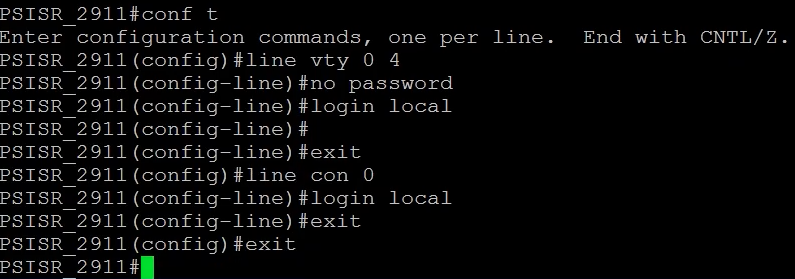
Virtual terminal enable:
PSIR_2911(config)#line vey 0 4
PSIR_2911(config)#no password
PSIR_2911(config)#login local
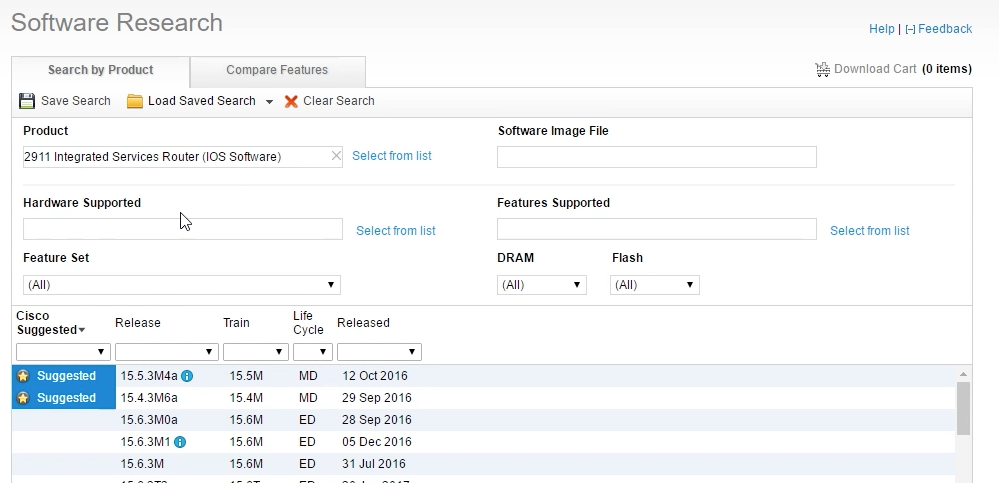
IOS – Flash upgrade
Find correct iOS from Cisco software research site
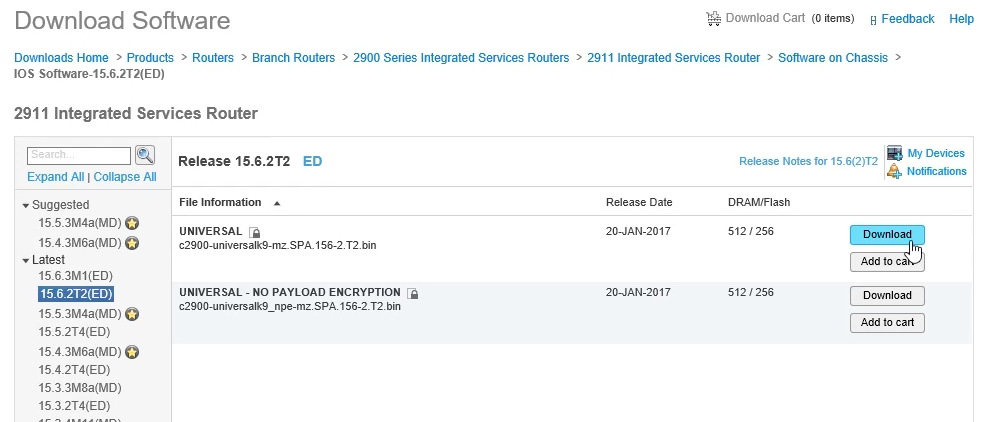
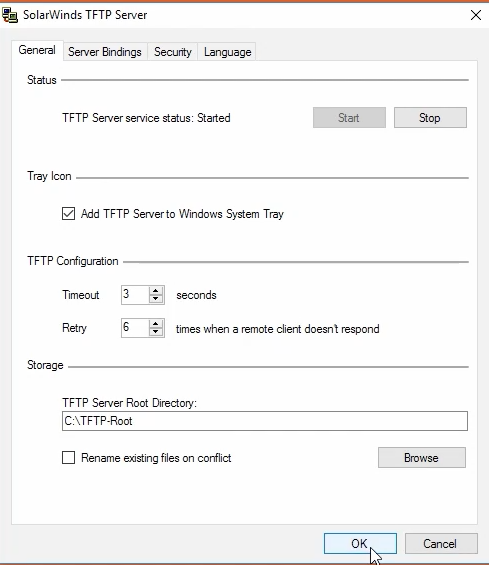
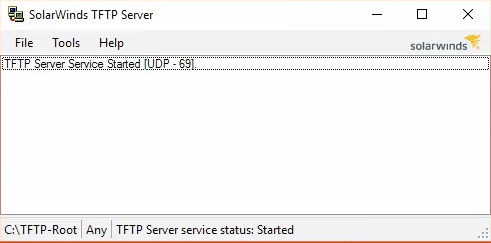
For IOS upgrade required TFTP server
TFTP- Trivial File Transfer Protocol
Download tftp server from solarwinds.com
https://www.solarwinds.com/free-tools/free-tftp-server
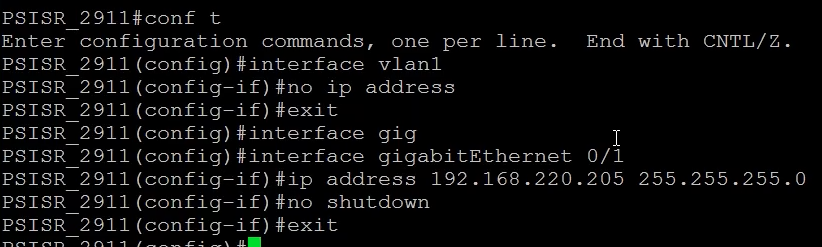
We have to configure router physical interface to particular IP address in order to access tftp server.
Open tftp server turn On
PSIR_2911(config)# line vty 0 4
PSIR_2911(config-line)#transport input telnet ssh
PSIR_2911(config-line)#exit
PSIR_2911(config)#wr mem
now move latest iOS file to flash drive on router
PSIR_2911(config)#copy tftp://192.168.220.141/c2900-universal-mz.SPA.156-2.T2.bin flash:

After complete transfer iOS file. check flash drive file received or Not
PSIR_2911# dir

Now we have to change old booting iOS file to new iOS file path.
PSIR_2911(config)#boot system flash:c2900-universal-mz.SPA.156-2.T2.bin
PSIR_2911(config)#exit
PSIR_2911#wr mem
PSIR_2911# reload

Now we have old iOS kept in flash drive. we have to remove from the system.
PSIR_2911#dir. – Note on the old file name
PSIR_2911# del flash:c2900-universal……M2.bin
confirm delete old iOS file.
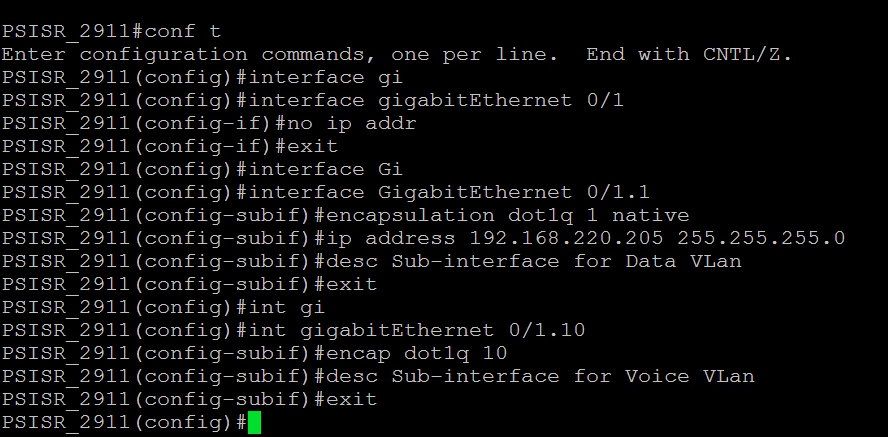
Setting IP address on data vlan and voice vlan using sub interface.
PSIR_2911(config)#interface gigaethernet 0/1
PSIR_2911(config-if)#no ip address
PSIR_2911(config)#exit
PSIR_2911(config)#interface gigaethernet 0/1.1
PSIR_2911(config-subif)#encapsoluation dot1q 1 native
PSIR_2911(config-subif)#IP address 192.168.220.205 255.255.255.0
PSIR_2911(config-subif)#desc interface for data vlan1
PSIR_2911(config-subif)#exit
PSIR_2911(config)#interface gigaethernet 0/1.10
PSIR_2911(config-subif)#encapsulation dot1q 10
PSIR_2911(config-subif)#IP address 172.20.220.205 255.255.255.0
PSIR_2911(config-subif)#desc interface for voice vlan10
PSIR_2911(config-subif)#exit
PSIR_2911(config)#wr mem

Set time and date –
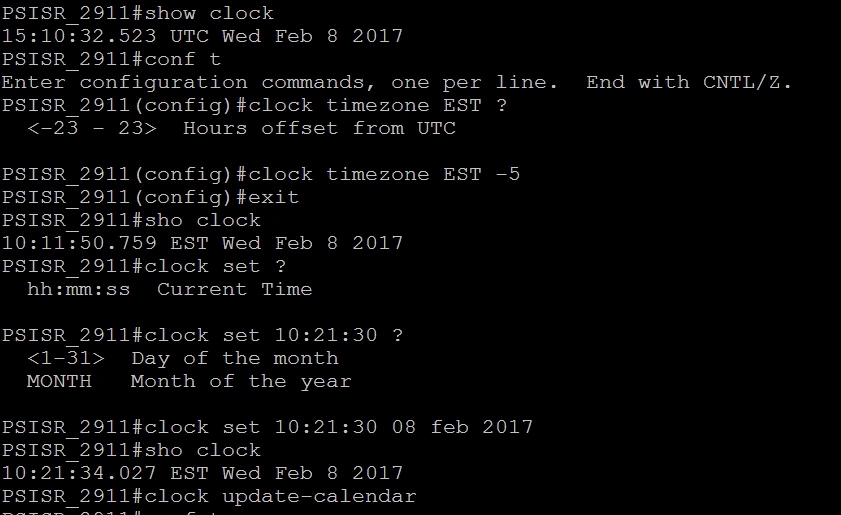
Configure NTP server and DNS access
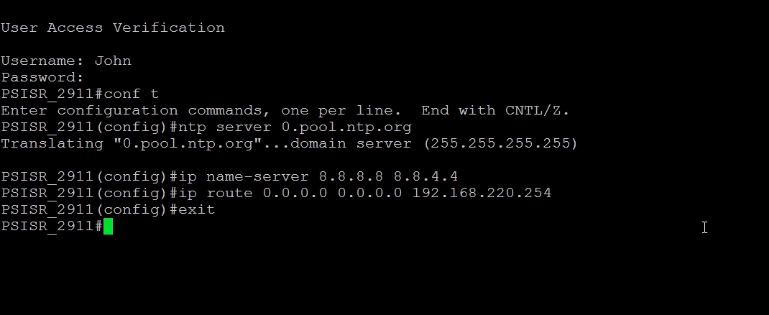
PSIR_2911(config)#ntp server 1.pool.ntp.org prefer
PSIR_2911(config)#ntp server 2.pool.ntp.org
PSIR_2911(config)#ntp server 3.pool.ntp.org
PSIR_2911(config)#exit
PSIR_2911#show ntp config
PSIR_2911#show ntp status
PSIR_2911#wr mem
Check and confirm ntp server working well.
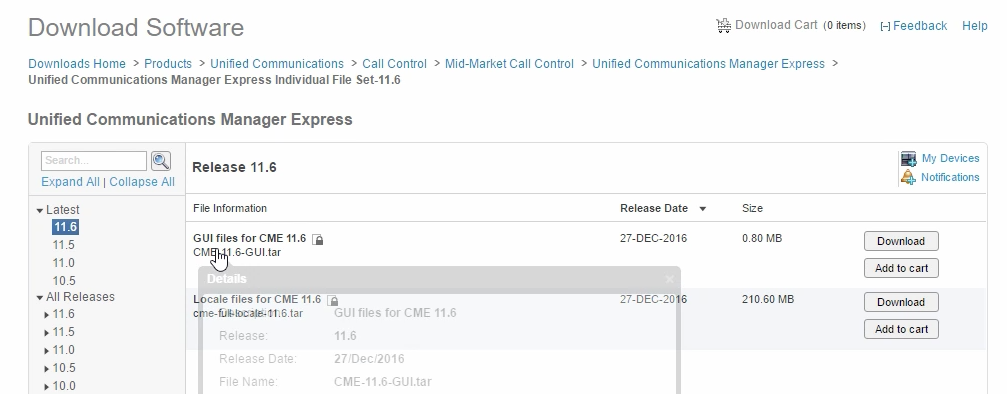
Installing UCME GUI
UCME- web based administration , easy configuration of some settings. not installed by default.
Download Cisco UCME from website.
Download file and copy to tftp root folder
start run on tftp server
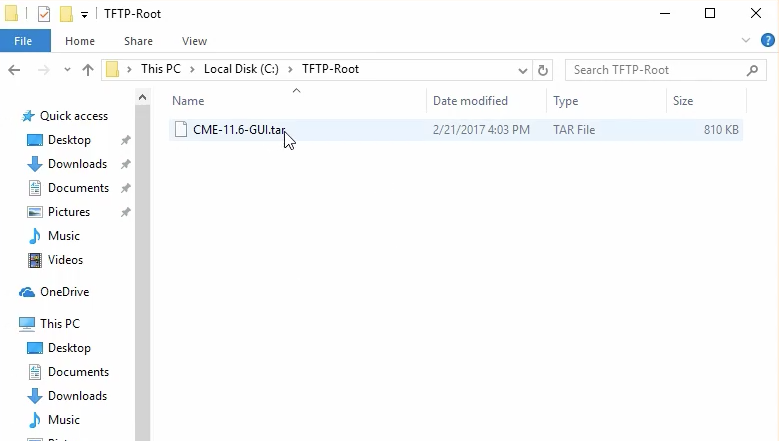
Open putty and copy UCME file to flash drive

Now enable embedded webserver
PSIR_2911(config)#ip http sever
PSIR_2911(config)#ip http auth local
PSIR_2911(config)#file privilege 0
PSIR_2911(config)#telephony-service
PSIR_2911(config-telephony)#web admin system name johnGUI secret 0 GUIPass0
PSIR_2911(config-telephony)#dn-webedit
PSIR_2911(config-telephony)#time-webedit
PSIR_2911(config-telephony)#exit
PSIR_2911(config)#ip http path flash:/CME-11.6-GUI
PSIR_2911(config)#exit
PSIR_2911#wr mem

Now finished installation UCME Gui- access from web browser.

Backup configuration: Save router configuration to local desktop using tftp server
First turn on tftp server and note it down IP address
PSIR_2911#copy running -configuration tftp://192.168.220.205
